Monday 31 March 2014

Plague Toads work in progress part 2

All work and no play makes Tony of Nurgle eager to spread the pox.

So I've done a bit more work on these gruesome little bundles of joy over the past week or so.

I haven't seemed to get any more than a half-hour or so to sit and work on these at any one time, but I think I'm slowly getting there...


Friday 21 March 2014

Plague Toads work in progress part 1

Just before Christmas I picked myself up a set of Plague Toads from Warhammer World when I went there for the CoreHammer meet up. Uncharacteristically, I've managed to go just less than 3 months before beginning work on them, rather than the much more typical 18 months - 2 years...

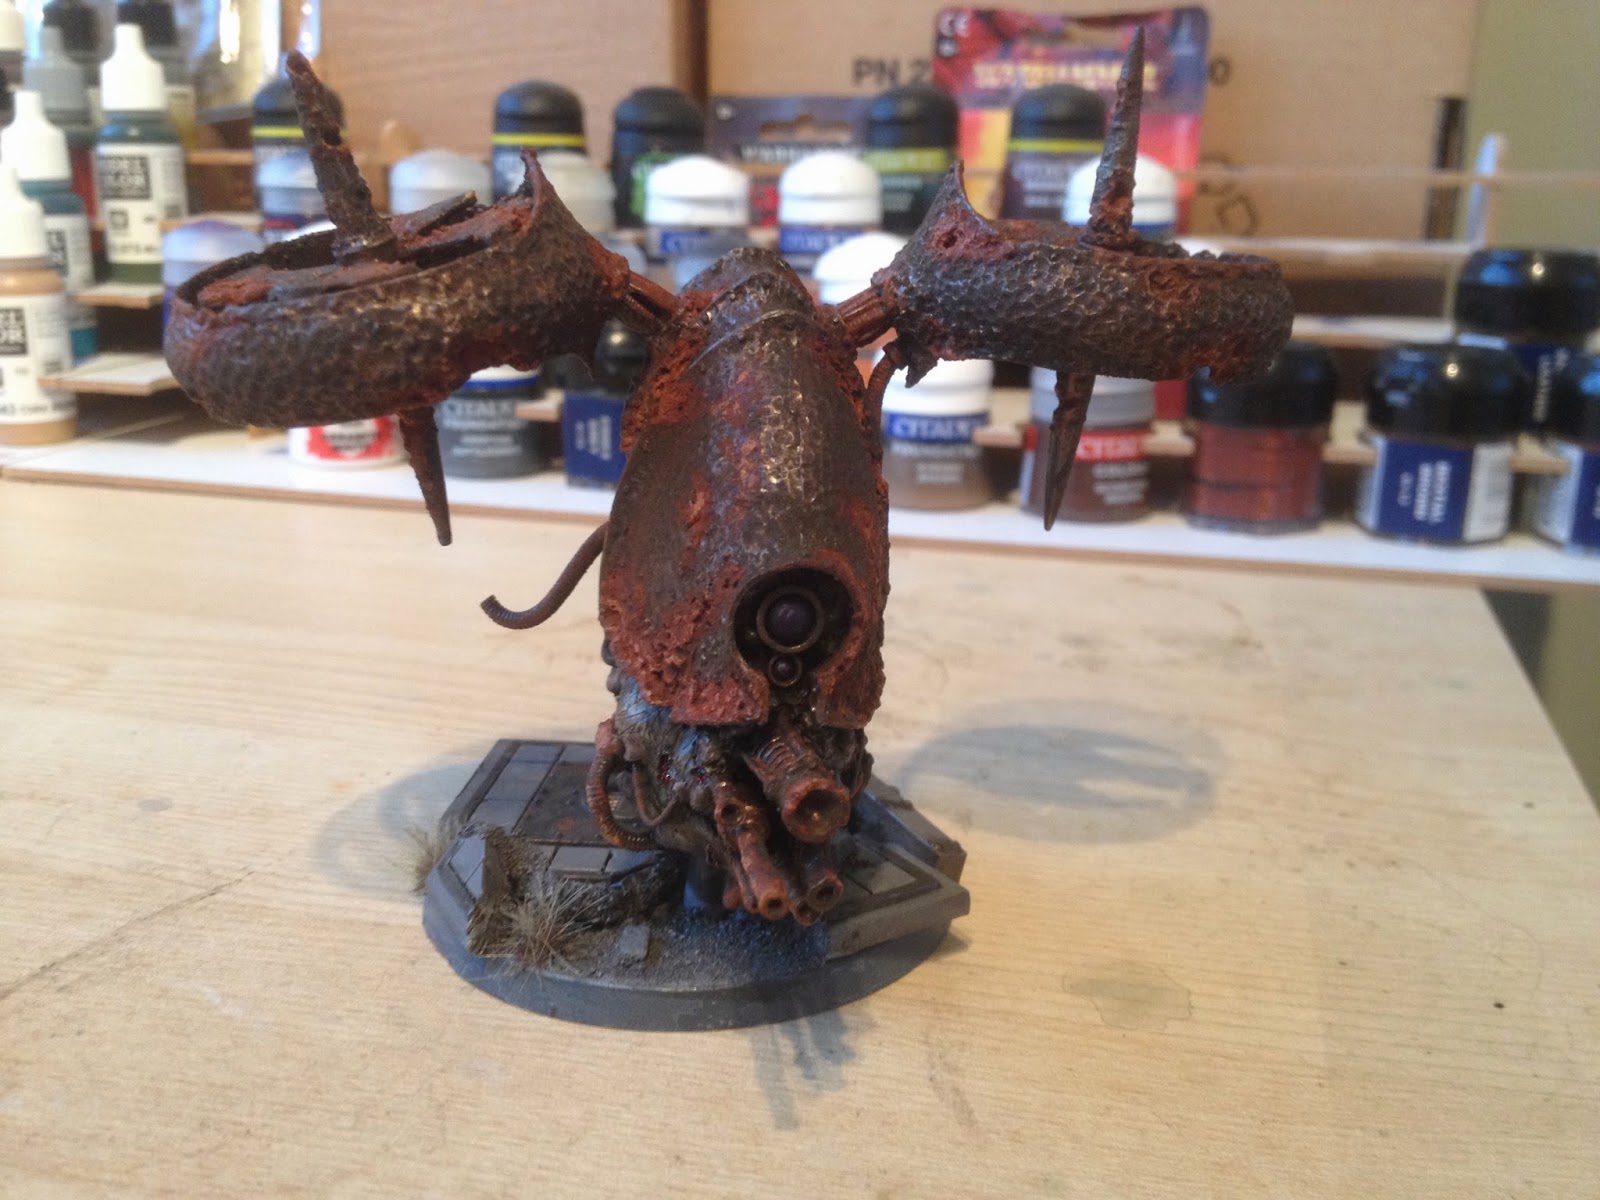
I love these models. So unpleasant. Loads of really nice subtle (and not so subtle) touches in these sculpts.  A personal favourite touch is the strange inclusion of an outsized human shaped leg which occurs in the form of a front leg on a couple of the toads. It's gruesome.

I decided quite some time ago that I would like to use these chaps as chaos spawn in my Death Guard army. I think they will fit in nicely.

I've mounted these on trimmed down spare flooring sections from the Cities of Death building kits, and in turn these floor sections have been mounted on 40mm round bases.  I needed to do this to make the models look a bit more convincing. Putting them directly on to the bases just looked weird, because of the amount of overhang.  The tiles added a bit more support from below without increasing the footprint of the bases appreciably.  These lads need to be tabletop legal, after all.

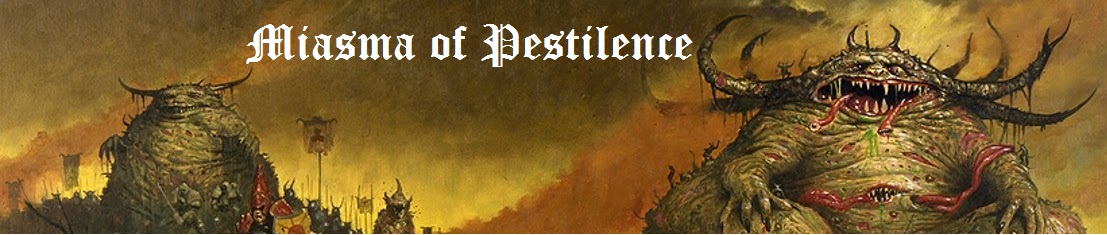
The majority of colouring here has been done with the airbrush. Vallejo black primer and grey primer mixed to undercoat.  This was then oversprayed with Vallejo Russian Green primer. Duck egg was then carefully sprayed on to any areas that I considered to be the underside / underbelly. A rough murky mix of P3 Thrall Flesh, Vallejo medium grey and some unspecified green that I can't remember was lightly drybrushed on to the raised areas.

I layed down a base on the raw exposed flesh areas with a rich, burgundy colour from the P3 range (Sanguine base if memory serves - the label got peeled off!).  The teeth, claws and horns were given a thin coat of GW Calthan Brown. Over all this, I used my "murk wash" to add a bit more depth.

Anyway, below are some pictures of the little I've done so far.


Thursday 20 March 2014

Blight Drone completed

So here we have it.

The finished product.  I've not added a major amount to this since the last post. Mainly a bit of light touching up and the application of some Tamiya Clear Red to the wounds.

Once again, I'd emphasise how awesome this kit has been to work with  - I'd definitely do one of these again, but maybe try and push the modelling element a bit further.  I reckon starting over from scratch that I could definitely produce something more disgusting than this...


Tuesday 18 March 2014

Blight Drone work in progress part 2

As a follow on to last week's post, here is some more work in progress.  I've been trying to spend a bit of time on this most days, with varying degrees of success...  Love this kit.

Really happy with the results so far.

Mainly, I've worked on:

1. the base for the model, which I've added some spare parts from the Cties of Death kits to, along with some Pegasus bricks, and some Army Painter tufts
2. some glazes and washes on the slug part of the body
3. Gluing the kit together.

This work has been carried out with the audio assistance of the Lawrence Arms, the Doughboys, Samiam, Suicidal Tendencies, Mega City Four and Dillinger Four.


Monday 10 March 2014

Blight Drone (work in progress)

Well over a year ago, I bought the amazing Blight Drone kit from Forge World, and over the last week or so, I've finally gotten around to getting some paint on it.  I've still got a considerable way to go to get this beast finished, but I thought I'd share what I've done so far.

I think for a while I'd been worried about accidentally trashing this amazing kit by doing a poor paint job on it.  That's why it had remained untouched for so long.

Once I got into the swing of this, I decided to do something else I'd been putting off for ages. Using the Vallejo weathering pigments I'd bought over 2 years ago.  Again, I'd been terrified of wrecking a cherished model by messing up in the application of this stuff. I'd had no idea how to use them, and incredibly, didn't even bother looking at any tutorials.  I'm an idiot.  This stuff is really, really simple to use, and great fun to mess about with. Truly I am fool of preposterous proportions (disclaimer: Tony of Nurgle is by no means bloated or fat).

This is an airbrushed base coat washed with Typhus
Corrosion

The "slug" part is a coat of Russian Green primer and
a further coat of Duck Egg applied by airbrush, then
washed with my "murk" mix

The first bit of pigment application was done on the turbines in order to try
and get a feel for how they worked. I just made a paste with a bit of water, a
bit of Vallejo Matt Varnish and some pigments. I then applied some more
pigments in a lighter shade onto the paste (use a shitty brush for this).

Natural light

more natural light

The flash here shows the varying layers of pigment. It looks less crap in
natural light, though

More flash illumination


Related Posts Plugin for WordPress, Blogger...